General information
Hot VPN Pro Version: 1.0Completed on: 15/08/2021
Created by: Harsha
Support Email: maramsaiharsha128@gmail.com
Thank you for Checking out Hot VPN Pro. If you have any questions that are beyond the scope of this help file, please feel free to write me a email. I will reply in minimum time.
Introduction and quick start guide.
Thank you so much for Visiting Hot VPN Pro. Please feel free to contact me if you have questions or problems about this app. No guarantee is provided, but i will do my best to provide you with the best possible assistance.
Which Android Studio version is needed?
Latest Android Studio version is recommended, which can be downloaded from here : Android Studio
How to Open The Project in Android Studio?
To open app in android studio, Go to Android Studio > Open an Existing Android Studio Project > Select
Your Hot VPN Pro project file > ok
After that It will take few minutes in process and your app will be
succesfully import.
How to Change app name?
To change the app name. Go to (Res > Values > Strings.xml) Here you will find the app name . Remove the old app name and Enter your new app name here.
Example: Enter your app name inside "Hot VPN Pro"
How to change Package Name?
To change the package name, Go to (Java > Com > harsha) right click on harsha then go to (Refactor > Rename) after clicking on rename, Enter your new package name in dialog box and click on refactor after that in bottom you will see, do refactor button. Click on that button. your first package name process would be complete. After changing package name from here you have to follow one more step to complete the package name.
Now go to (build.gradle) and find the application id.(Eg: com.harsha.hotvpnpro) Enter you package name same as you enter above process, and click on sync. Your package name has changed now.
How to setup One Signal Notification?
Go to (build.gradle) and enter your onesignal ID at the place of (put_your_onesignal_id_here).
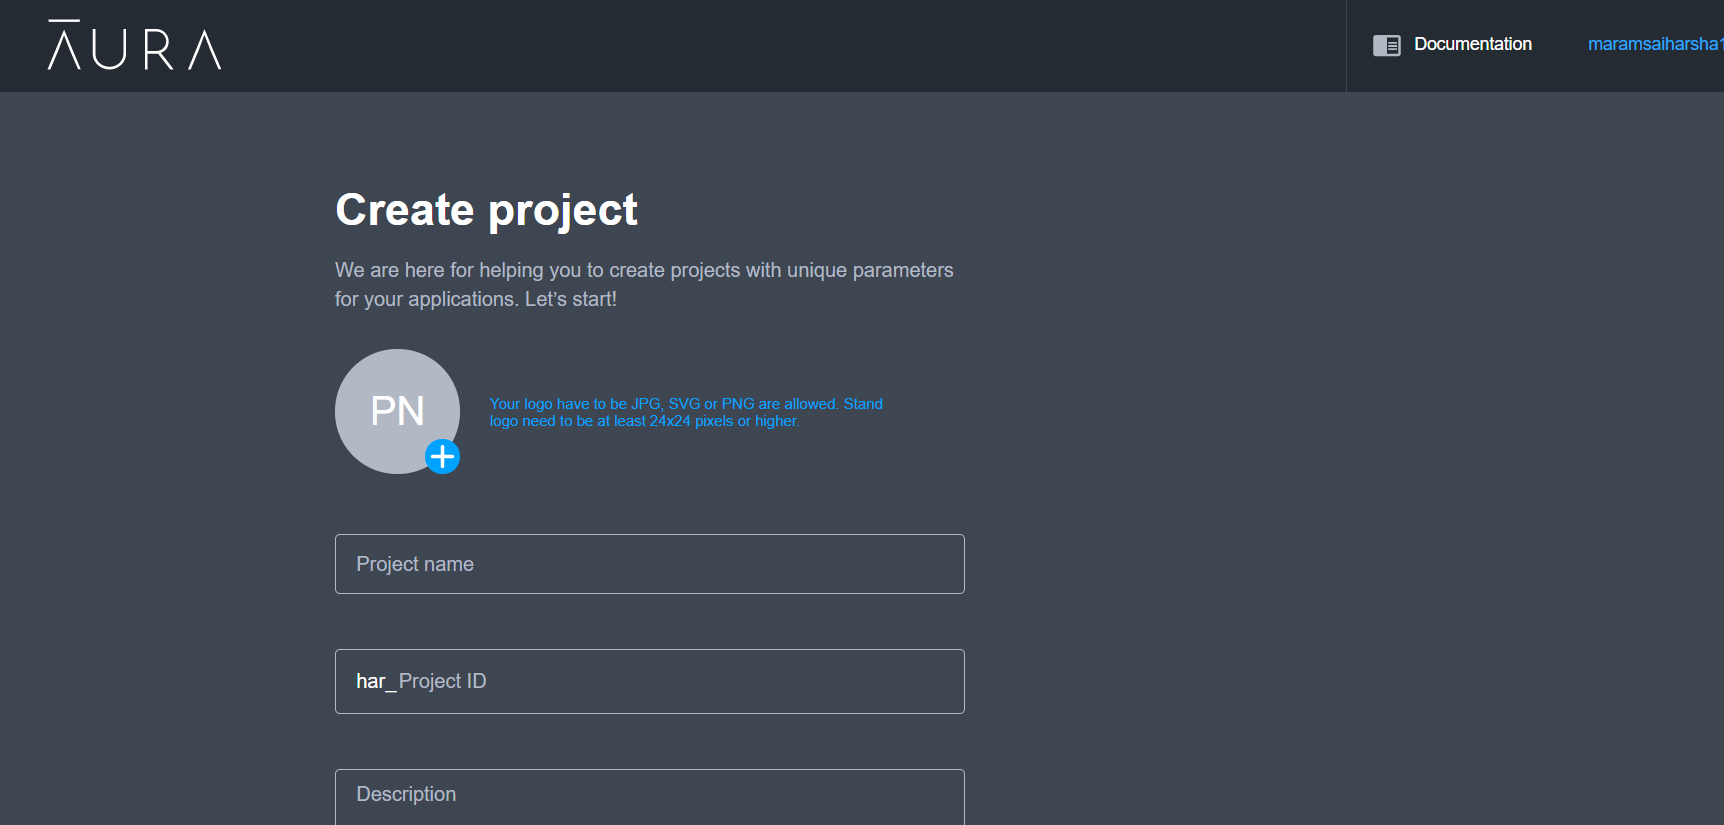
How to Setup your own VPN SDK Credentials?
Go to developer.anchorfree.com and Register a free account at developer.anchorfree.com After Registeration Create a new project. Fill information as below given image
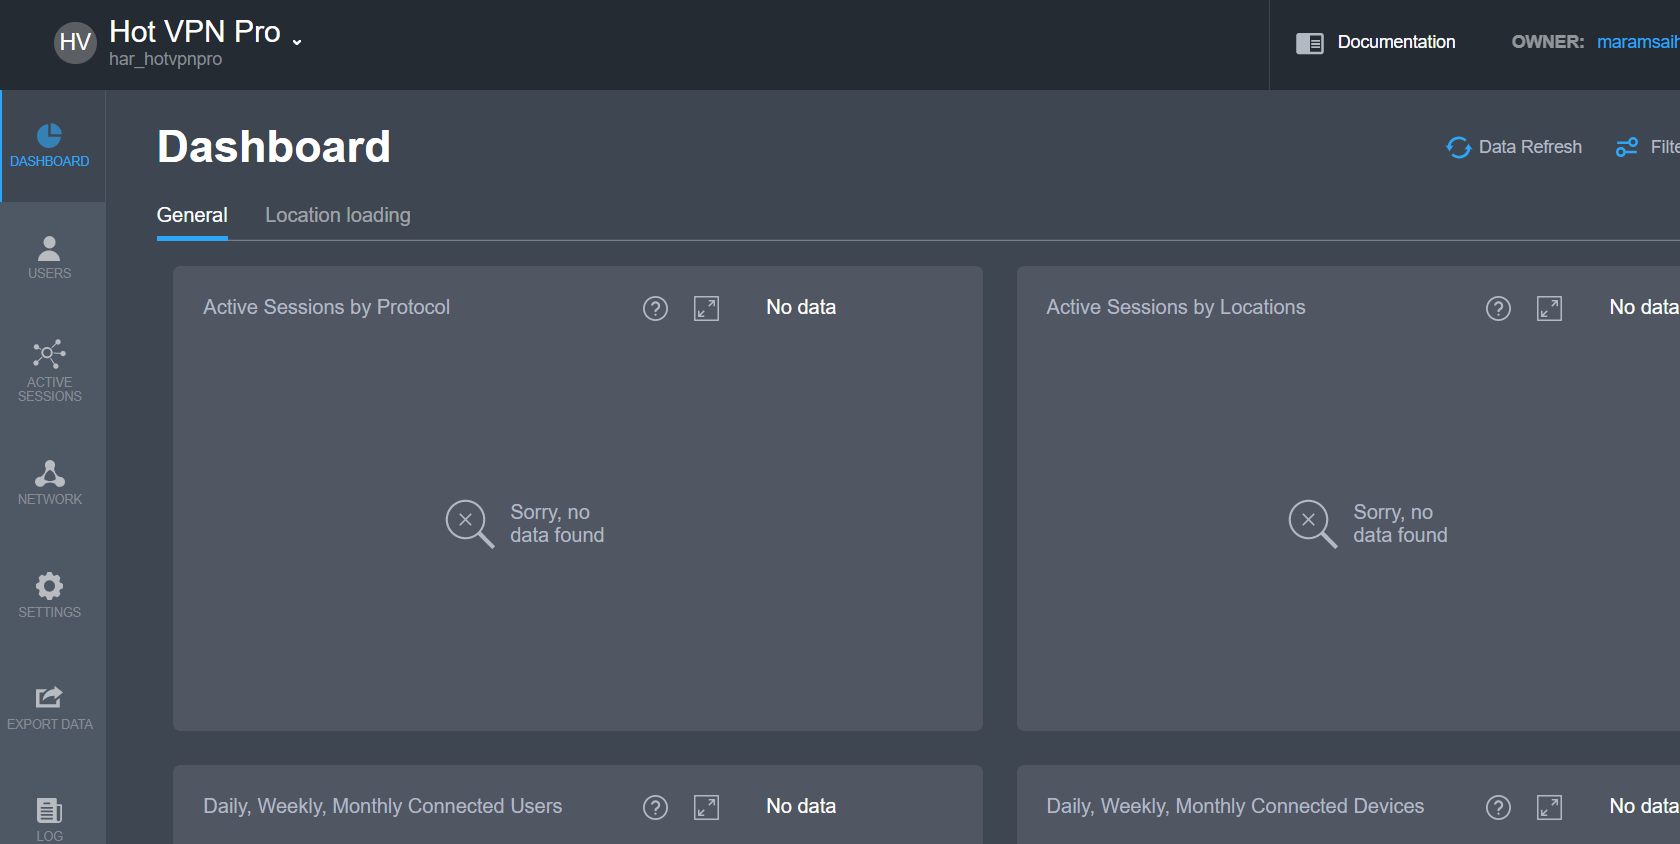
After Creating project click on your app project as below given image
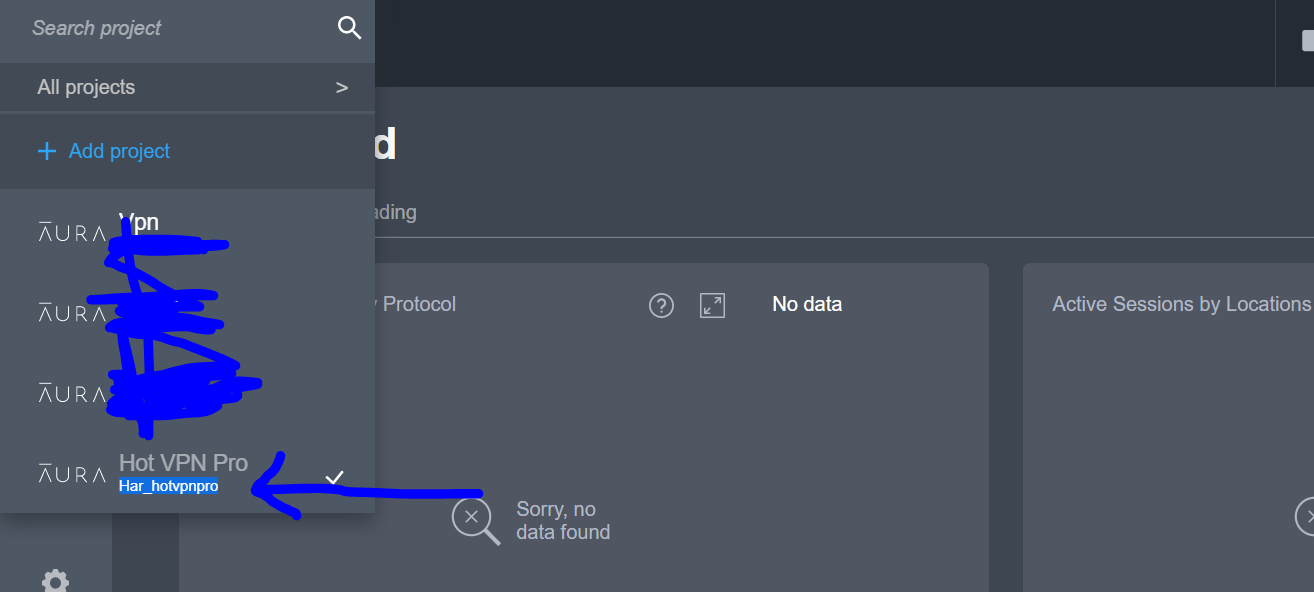
Now copy your project id as shown in below image
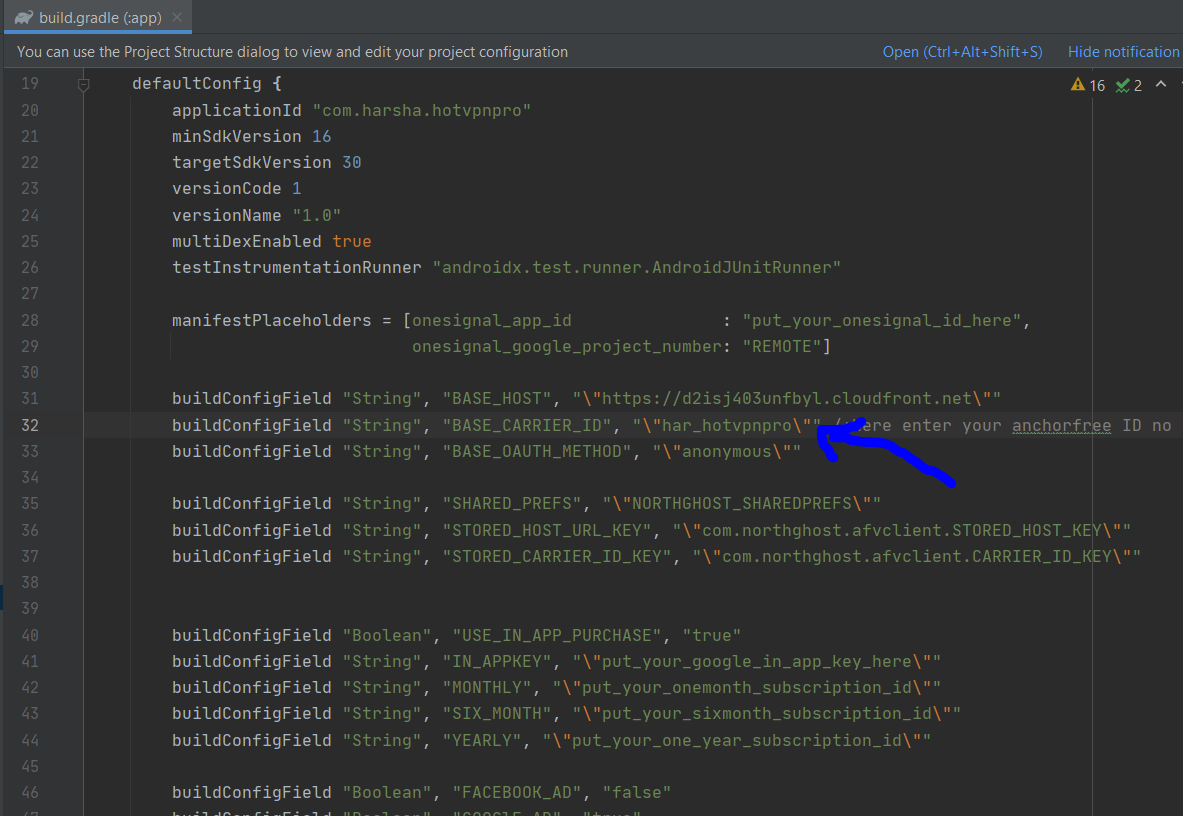
After copying your project id Go to android studio and open build.gradle and find the BASE CAREER ID Line and replace/paste your code on the place of blue line given below image
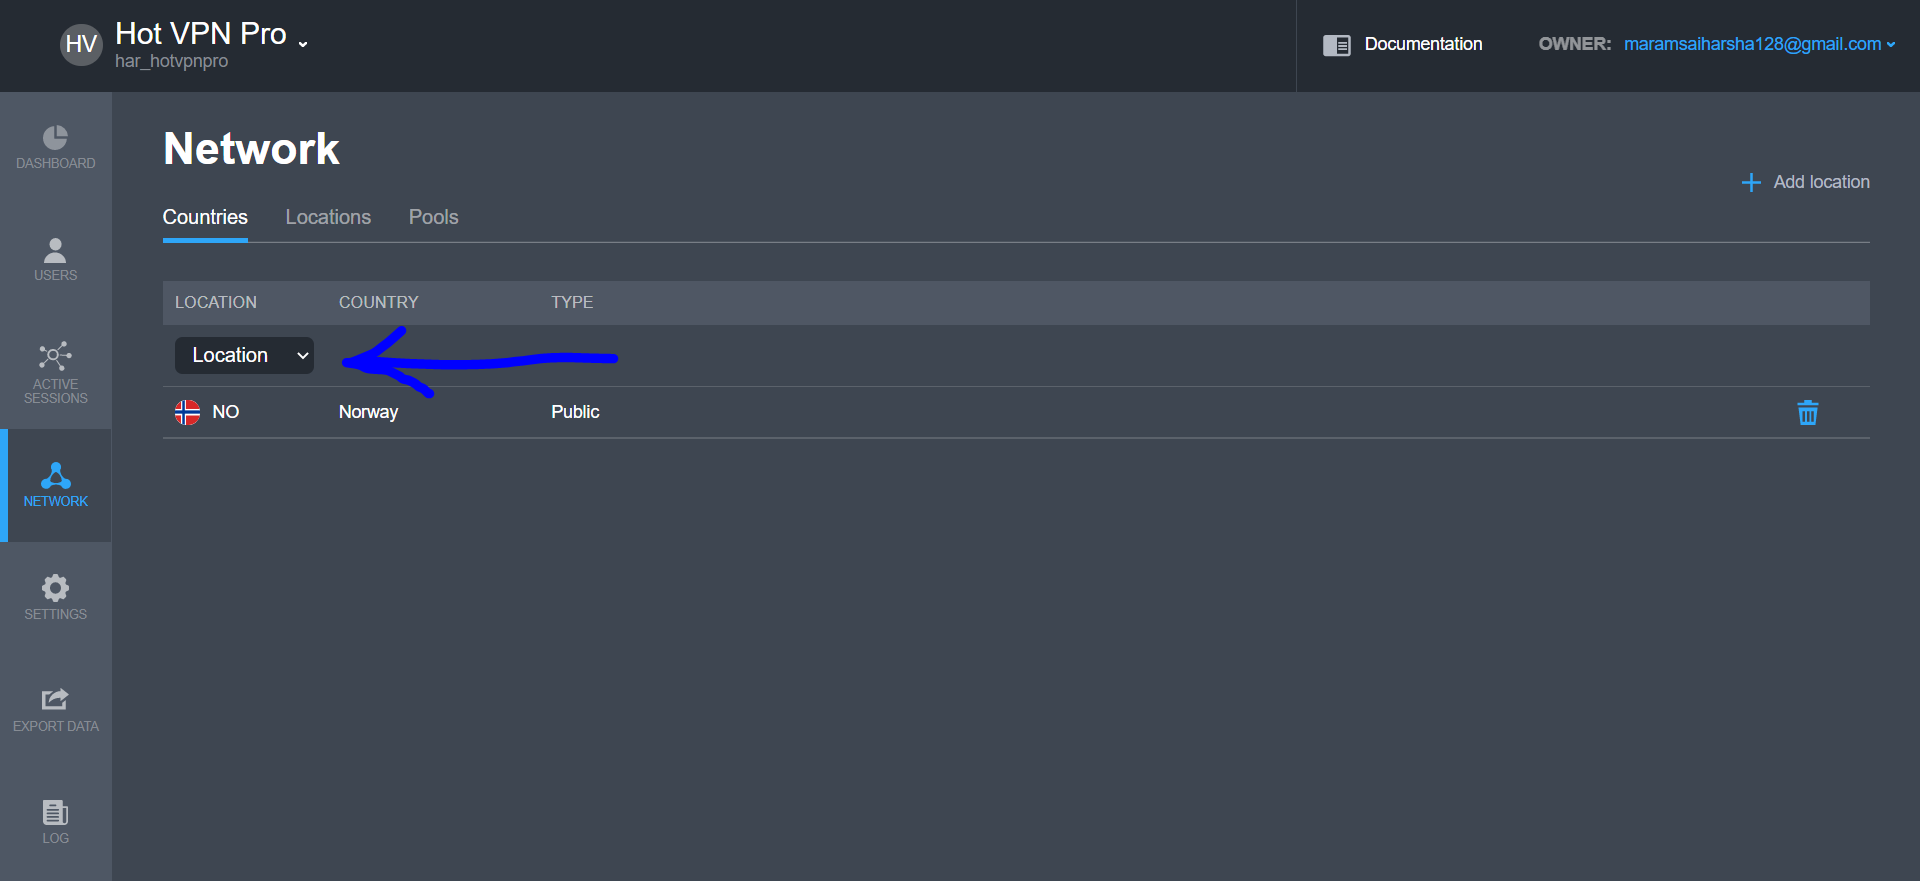
Now go to your developer.anchorfree.com Dashboard and click on the Network. after that click on add location then select location. You can select location one by one as many as you want to keep in your app. See screenshot below
How to Setup Facebook Ads and Google Ads?
To setup facebook ads Go to (build.gradle) and enter your facebook Banner and Interstitial ID in (as per below given image)
To setup Google Ads enter your Details there.

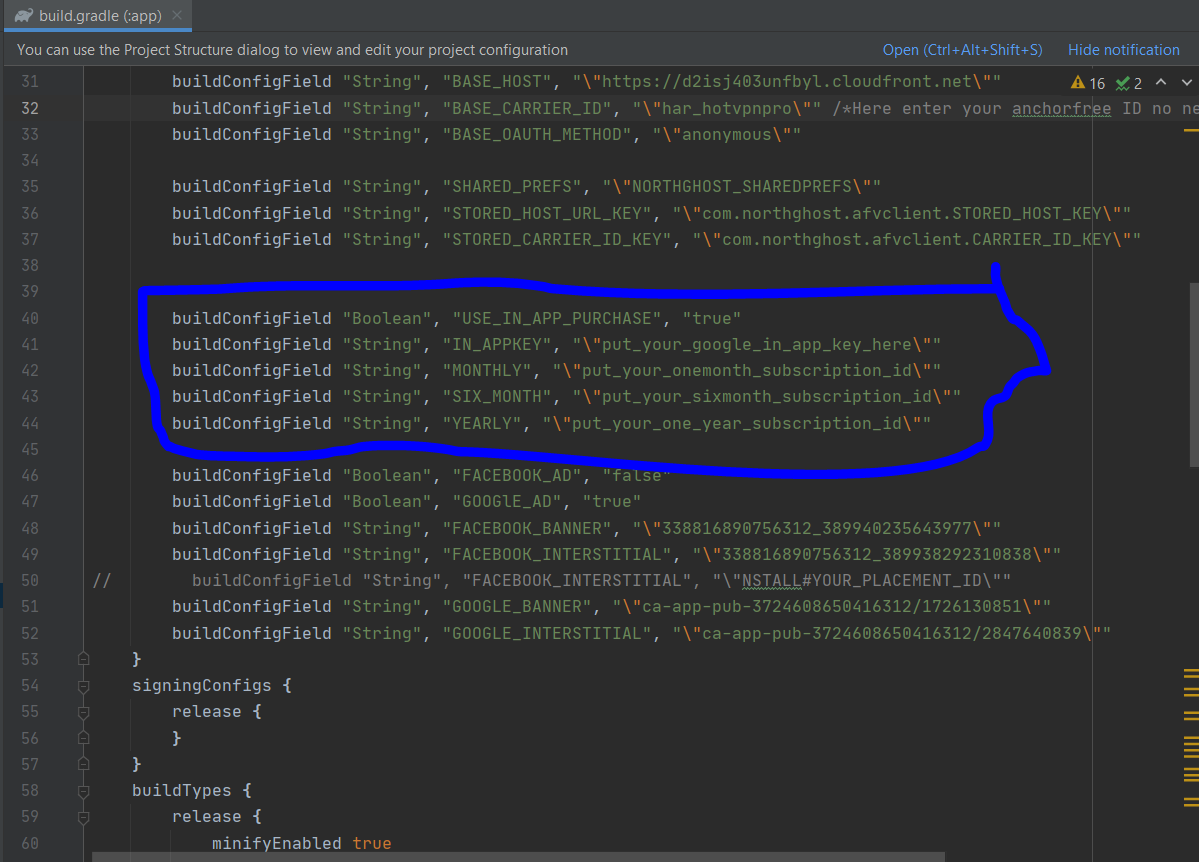
How to Setup In-app Purchase?
To setup In-app Purchase Go to (build.gradle) and find the below given values. Enter your all in-app purchase in the place
Once again, thank you so much for Visiting my app. As I said at the beginning, I am glad to help you if you have any questions relating to this App. Just contact us via email at maramsaiharsha128@gmail.com. And please do not forget to Follow me on GitHub! :)
Thanks & Best Regards
Maram Sai Harsha